STUFFED Peppers with Quinoa & Smoked Almond Romesco

Quinoa stuffed pepper.jpg

A few weeks ago I had Romesco sauce and I immediately thought I had to make a healthier version at home.  Romesco sauce—a roasted red pepper and almond spread originating in the Catalonia area of Spain— is my current favorite go-to sauce for a quick and healthy lunch or dinner.  This Romesco sauce recipe is gluten-free, contains no bread, and is delicious on just about anything.  Mars likes it on chicken, Jordan loves it on french bread, and I've been putting it on everything

Make your quinoa, prep fresh bell peppers and Romesco sauce on Sunday and enjoy all week long.  Cook quinoa according to package.  Wash, remove seeds and cores and slice peppers in half.  Stuff with quinoa (approx 1 tablespoon per 1/2 pepper), then top with 1 tablespoon of Romesco sauce. 

Smoked Almond Romesco Sauce (Makes 2 cups)

Ingredients
    •    1 large tomato
    •    4 cloves garlic
    •    1/2 cup almonds (unsalted & unroasted)
    •    2 medium red bell peppers
    •    1/4 cup olive oil
    •    2 tablespoons sherry vinegar or lemon juice
    •    1 tablespoon smoked paprika
    •    1/8 teaspoon cayenne pepper (optional)
    •    Salt and pepper to taste (usually a few pinches)

Directions
Preheat oven to 450°F.  Line a baking pan with foil.  Arrange almonds, garlic, and tomato on baking sheet and place in the oven. Roast almonds until fragrant, about 10 minutes.

Remove almonds and continue roasting garlic and tomato until soft, about 15-20 minutes more. Remove from oven, let cool slightly and peel garlic.  If you purchase pre-peeled garlic, it's easier. 

While the almonds, garlic and tomato are roasting in the oven, roast peppers over an open flame until the skins are blackened. Set peppers aside and let sit until cool for 15 minutes, then remove charred skin, seeds, and cores.

Place tomato, almonds, peppers, olive oil, sherry, paprika, salt, and pepper in your Vitamix or food processor. Purée until smooth. Taste and season with additional salt and cayenne pepper as needed.

Place in and airtight container and place in the refrigerator until cool. Store refrigerated up to 5 days, or freeze.  Enjoy!

LAUREN BOGGI'S BASIC COLLARD WRAP

Collard.jpg

Whether you're crunched for time, can't bring anything to the dinner table (literally, not figuratively), are trying to ditch the bread, or can't eat another salad...collard greens to the rescue!  I've always turned to collard greens when preparing healthy "sandwiches" for myself and others; they were a favorite offering in my healthy, to-go foods line. 

Substitute collards for bread or your traditional wrap, and you'll most likely feel lighter, healthier, and became leaner. I've watched people lose 10-20 lbs. from simply making the swap.  Anything you have in your fridge can be wrapped inside and made into an easy, to-go meal. 

Whatever I end up putting inside, I like to start with a great base that will hold the ingredients together, marry the flavors, and give the wrap some heft, like hummus or smashed avocado; hummus adding protein and avocado giving you some healthy fat for brain power.

Then, I'll layer in some crunchy veggies for texture and I always add a little quinoa (2 tablespoons) and nutritional yeast for a little protein.  I love the creaminess, the crunch, and the subtle texture from the veggies and quinoa.

There are so many ways you can stuff these things, so have fun creating your own combos.  Some of my favorites are steak and mushroom, chicken and pesto or chicken and peanut sauce, avocado and quinoa, tuna salad, chickpea salad, egg salad, turkey & cheese, the list goes on and on. 


BASIC COLLARD WRAP

Servings:  4  
Ingredients:
    •    4 collard leaves
    •    1/2 cup hummus, divided
    •    1/2 cup cooked quinoa, divided
    •    veggies for topping (cucumber, pepper, carrot, tomato, etc.)


Instructions:
Rinse and dry your collard leaves, then cut off the large stem at the bottom.  You can also shave off the thicker part that goes up into the leaf so it’s easier to wrap.  Lay collard down stem side up. Spread 2 tablespoons of hummus in the center of each leaf, then top with 2 tablespoons of quinoa and desired veggies.  To wrap, turn the collard so the stem and hummus-veggie pile is perpendicular to your body. Fold in the sides, fold the side closest to you over the veggies, then continue rolling until everything is nice and snug inside.  Slice in half on the diagonal, or eat as is. 

HOW I GOT HERE

LaurenBoggipng

I’ve always been a healthy, "clean" eater, but over the past few years I had noticed that my stomach would often hurt after a meal.  I chalked it up to stress or a possible gluten sensitivity.  Or, maybe I was just stuffing my face.  What I did know for sure was that my health was taking second place to an ever-growing list of professional and personal demands.

Then, in the fall of 2016, I had a severe auto-immune reaction to a Sweetgreen salad (SG, it's not you, it's me!). This particular salad was a triple threat: farro, quinoa, and tofu, along with a soy-based dressing.  I remember that I ate it on a Friday.  By that night, my stomach was six-months pregnant bloated, and my entire GI tract was painful to the touch.  I was in bed with a slight fever, chills and body aches.  It took me four full days to feel better, and I haven’t eaten tofu or farro since. 

After my company shut down in December 2016, I really went through it and completely fell off my healthy eating routine.  Initially, I was barely eating, and then when I did eat, I ate unhealthily and drank too much wine at night.  In February, my friend and co-worker, Katie (you often see her in the Studio LB videos) had just come back from two weeks in Panama followed by a wedding in Israel; three straight weeks filled with pasta, late nights out and lots of grilled cheese.  I overheard Katie talking to her sister about doing Whole30 for one month.  I decided that it wouldn’t hurt for me to check it out and join in. 

I looked into the program and noticed there were a lot of rules (and also a lot of bad press).  It’s designed to help you identify foods that have an adverse effect on your body. In order to identify these foods, you must first eliminate them for 30 days to get your body to its "purest" state, or blank slate.  So, no dairy, no sugar, no alcohol, no grains no legumes, including black beans, garbanzos, kidney or soy, and no additives like MSG.  Instead, the focus is: Meat, seafood, eggs, veggies, healthy fats like avocado, or olive oil, and low glycemic fruits like berries and apples. 

Not a problem!  I knew that I could easily do it my way since I eliminated dairy years ago and eat pretty clean, 80/20.  At the time, three “No’s” were not happening for me:  1.  Wine…because I was going through some sh*t, so I allowed myself 6 oz. per day.  2. Lentils, and garbanzo beans…because they are not processed, and they are my staple healthy, veggie proteins.  3.  Brown rice and quinoa…because I’m a big fan of rice (it has fueled 10+ Activations and killer transformations) and I know that 2 tablespoons of quinoa is my sweet spot.  Personally, I just cannot eat animal protein every day.  So I knew that I was going into this modified so that it would work for me.  What I was doing became the "Lauren Plan," and Katie and her sister did Whole30. 

Week 1: "All Set!" With my fridge stocked to photo-shoot perfection, I started out strong with full breakfasts, beautiful lunches, and awesome dinners. The first three days were great and I felt more energized.

Days four through seven were more difficult for me.  I don’t really ever deny myself what my body wants (within reason) but I really wanted to stick to my plan.  I packed tea and plenty of fresh fruit, nuts and crudité on days when the struggle was really real, and I called Katie whenever I was tempted to cheat.  On day seven my abs were popping like they hadn't in years and at that moment I was ALL IN.

Week 2: “Who dat!?”  On day 10, I felt like this was my new normal and I was never going back.  I was excited, and my energy was through the roof.  My mood swings and bellyaches were gone for good (except for that time I ate too many tubers), I was down four pounds (bonus!), and I was sleeping SO much better.

Week 3: “French fries?  Um, more veggies please!” By week three, I felt like the OG me.  I was awake and alert, early mornings became easy and I had absolutely no desire to eat crap or cheat.  And, I was telling everyone.  When I believe in something, I spread the gospel something fierce.  Like, everyone I knew HAD TO DO THIS. 

Week 4: “It’s over?  I’m never stopping.” I was happy my 30 days were almost over, because I was really excited to reintroduce some dark chocolate, and a little something in my coffee, but I also felt so freaking fantastic that I didn’t want it to end.  My insides felt so perfect and healthy that I was committed to this way of eating.

These guidelines and the official Eat with LB meal plan (coming in 2018) are influenced by Whole30 but it’s absolutely not Whole30. 

I incorporate these guidelines in my daily life. Since April 2017, I’ve stuck with this plan, adopting a 90/10 rule where I mostly follow the plan unless I am out with friends or have a special event. Currently, I’ve lost a total of 14 pounds without really trying or going hungry.   

My plan has changed my relationship with food for the better.  My metabolism is like never before, and I don’t miss sugar.  I look forward to prepping, planning and cooking for myself and I love knowing what fuel my body really needs for energy and peak athletic performance. 

I hope you commit to this and fall in love with real, whole foods and cooking as much as I have.  Find what really works for you, and what is a non-negotiable to go without (don’t say pizza).  Also, I highly recommend doing this with a buddy.  Now it’s a way of life for me, but I don’t know if I could have completed my second week without being able to lean on Katie.  

Check in, I'll be posting recipes, tricks and tips for you. 

You can do it! 

xx, Lauren

 

LAUREN BOGGI'S EASY SOUCHILI

Souchili.jpg

As soon as the weather changes my slow cooker comes out of hiding.  Not a soup, not yet a chili, this delicious and easy recipe can be made in 10 minutes and then cooks overnight or while you’re at work.  My boys love it with a french baguette. 

As long as you go light on the toppings (I'm talking about the cheese and sour cream) this is a low-fat, cholesterol-free, low-calorie source of iron, dietary fiber, potassium and protein meal. 

Ingredients:
    •    6 cups chicken broth
    •    1-1.5 lb uncooked chicken breasts
    •    2, 15-oz cans cannellini or great northern beans, drained
    •    1.5 cups salsa verde
    •    2 1/2 tsp. ground cumin
    •    Toppings: jalapeño, cilantro, shredded cheese, avocado, green onion, Greek yogurt or sour cream

Cook in slow cooker on low setting for 6-8 hours, or high for 3-4 hours until chicken is cooked through and shreds easily.  Add the beans during the last half hour of cooking. I like to shred the chicken and then serve with avocado, cilantro, yogurt and a sprinkle of cheese.


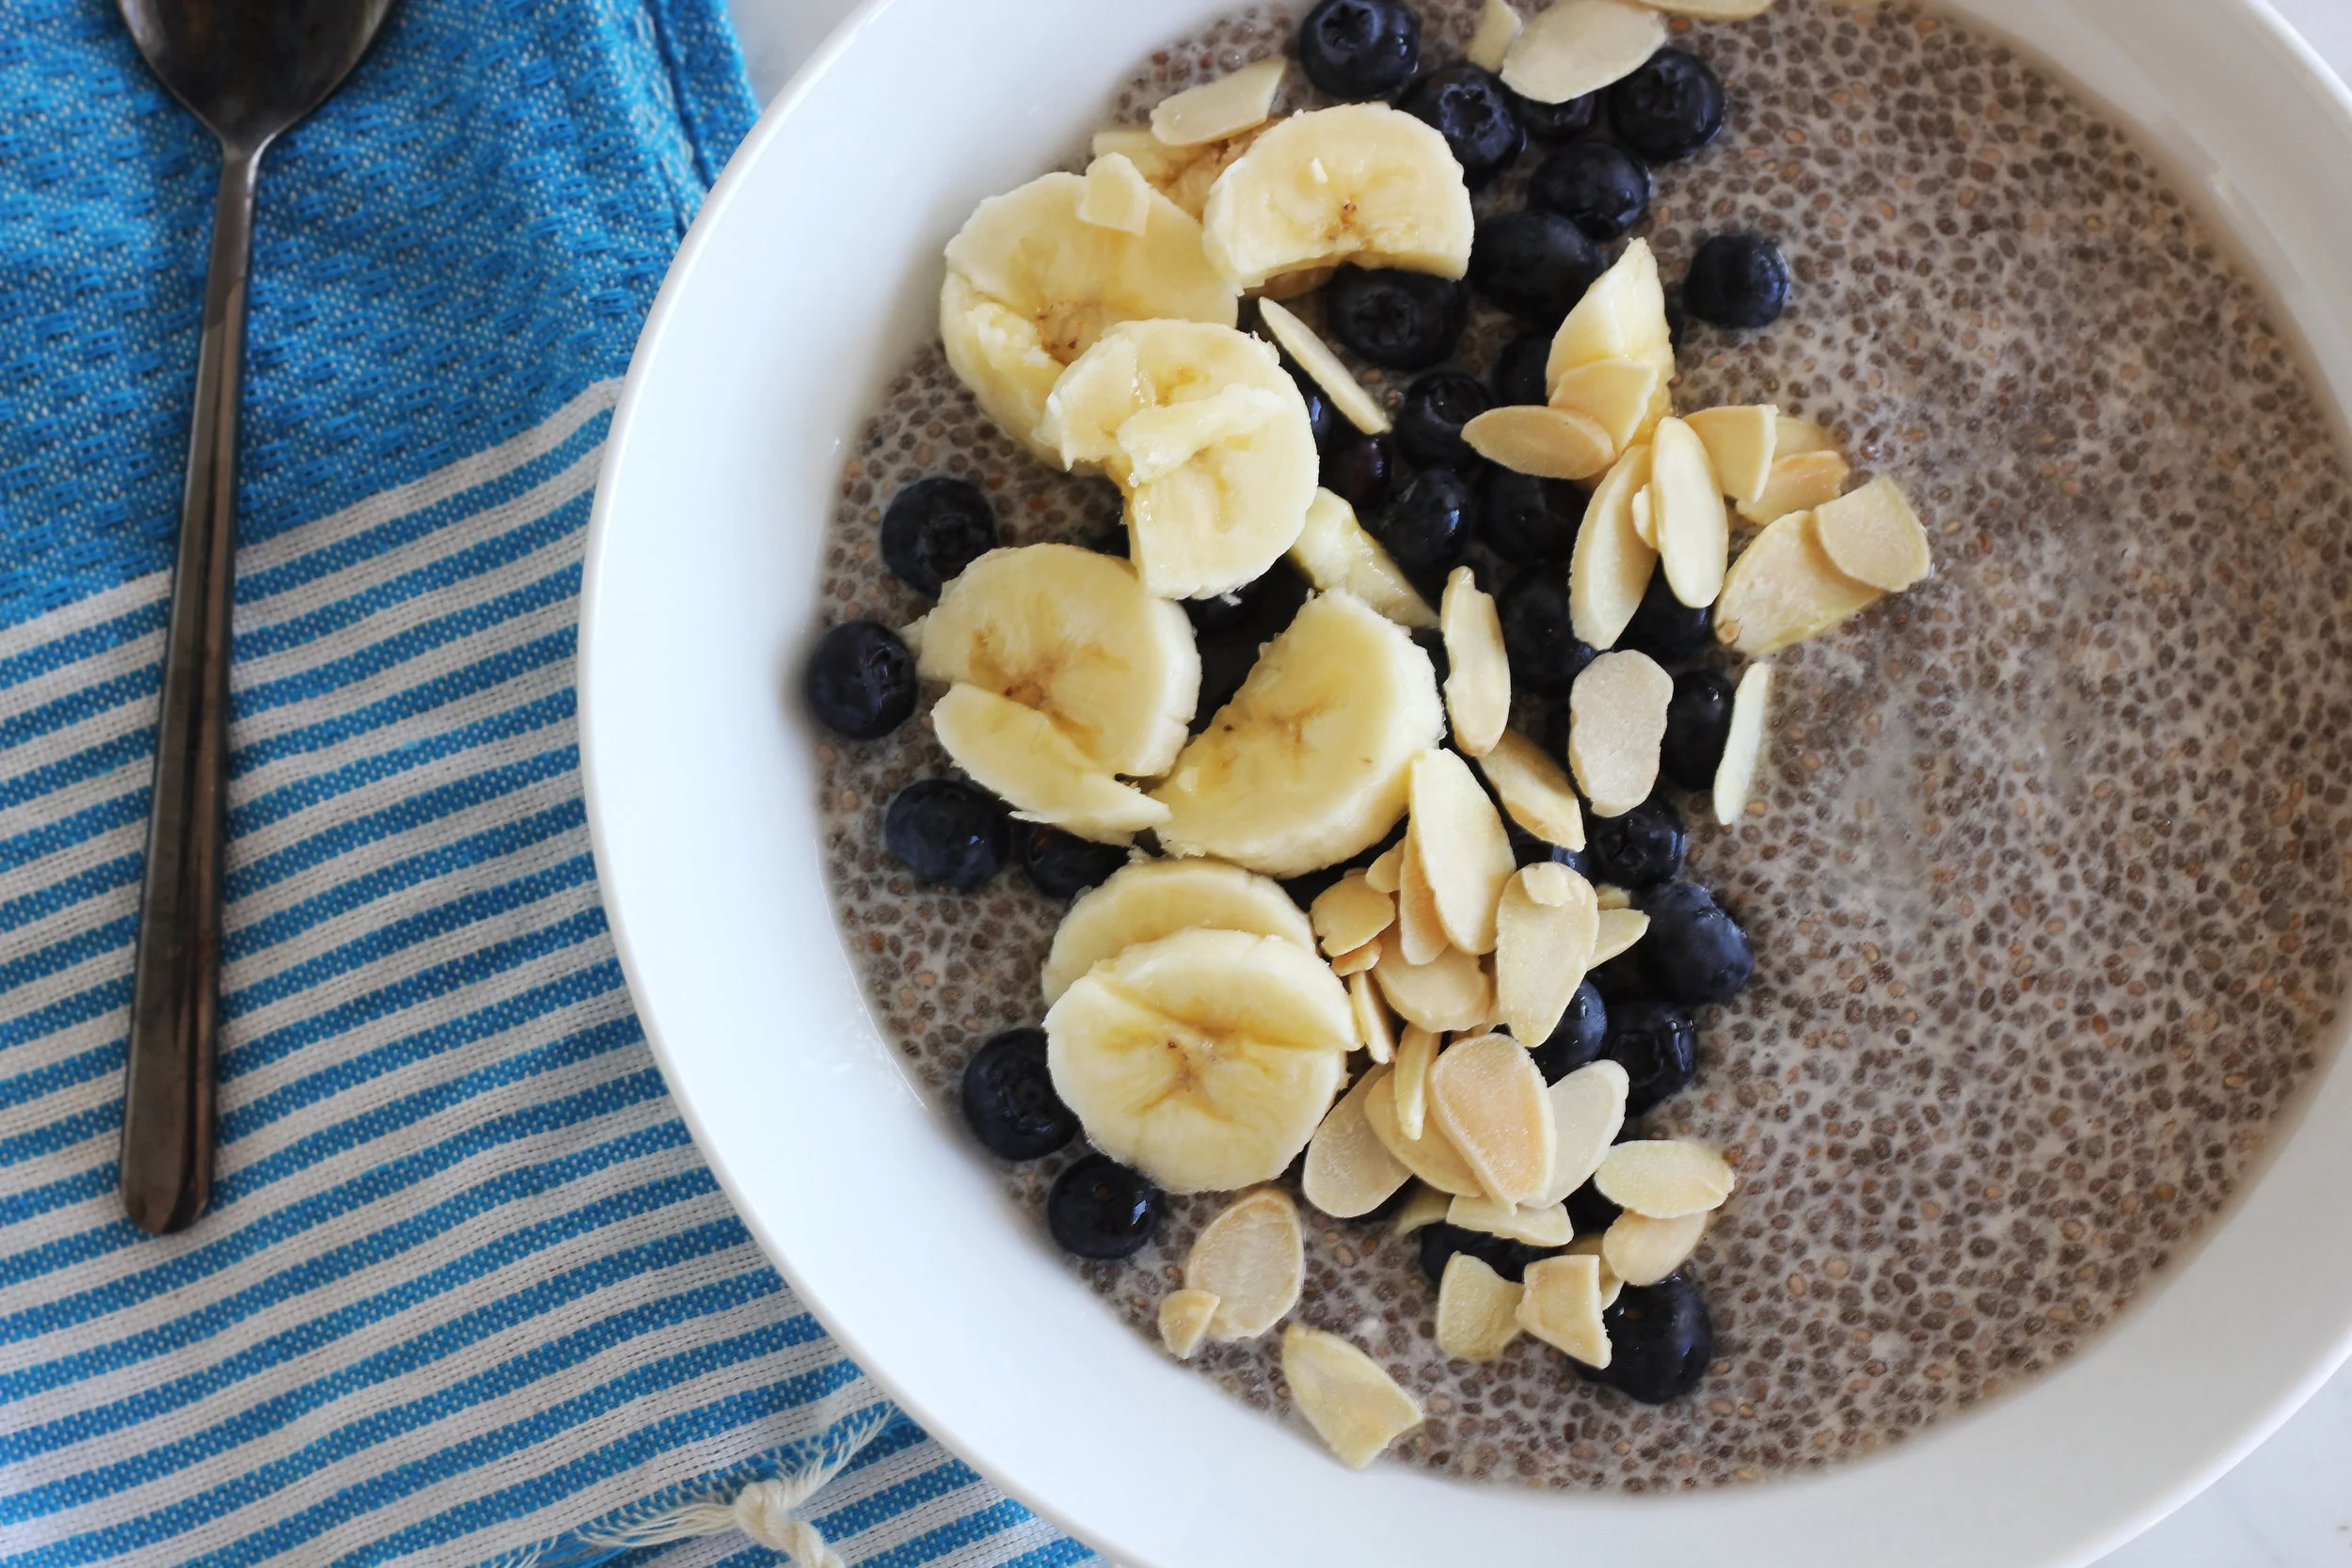
LAUREN BOGGI'S CHIA PUDDING

LaurenBoggiChiaPudding

I hadn't made chia pudding in like, forever, but recently friends of mine served it for brunch and I immediately missed it.  And, in the days following the great physical and mental trial that is moving house, there are only two types of eating to do: getting take out for every meal, or getting busy in your new kitchen. 

Chia pudding is easy to whip up, plus it makes the perfect stool (sorry, but it's true!).  

This recipe is vegan, gluten-free, grain-free, raw, and refined sugar-free and IT IS AWESOME because you can throw it together in just a couple minutes before bed and feel good about yourself in the morning.  I prefer to make this the night before so it has time to thicken up.

Makes: 4-6 servings,  Prep: 5 Minutes

Ingredients:

  • 3 cups unsweetened almond milk

  • 1/2 cup chia seeds

  • 2 teaspoons coconut sugar or pure maple syrup

Directions:

  1. Whisk almond milk, chia seeds, and sweetener together in a large bowl. Let sit for 5-10 minutes and then whisk again to prevent clumping.

  2. Cover and put in the fridge for 3-4 hours or overnight.

  3. Stir, then portion into bowls and add your toppings (fruit, nuts, cinnamon, etc.) Leftovers will keep in an airtight container in the fridge for 3 to 4 days.

LAUREN BOGGI'S AT-HOME FITNESS STORY

laurenboggi.jpg

Some of my earliest childhood memories are of my mom and I exercising in our basement.  Everyday she would head down the steps to break a sweat and I would follow her.  If I close my eyes and focus I can still recall the smell of the room, feel the cool humidity in the air and the way the thick striped exercise mat felt against my back.  After a few minutes of stretching, These Dreams would quickly become interrupted by Jane Fonda opening with, "Are you ready for a workout!?"

From the time I was six until about nine, I would mostly watch, and make my mom laugh by repeating every word of Jane's Original Workout, Tamilee Webb's Buns of Steel and all of the Aerobisize videos (obsessed), while she pushed herself to the absolute limit.  By the time I was fifteen, I was down there on my own and that's when my love affair with fitness really began to take shape. 

Fast forward to the summer before my freshman year of college.  I was scouted and received an invite to tryout for the SEC Division 1A University of South Carolina coed cheer team (and would win a full scholarship if I made it).  I had six weeks to get into the best shape of my life.  I needed: The body, serious athletic endurance, a six minute mile at minimim, a back handspring, a back tuck, a layout, stellar jumps, to stunt really well as a flyer (I was always a base) and dance really, really well.  And you know, the ‘it’ factor. Sure, I was captain of my high school squad, and an NCA All Star so I was far better than most, but I needed to be better than 600 or so other young athletes from the south who had spent their entire lives training for this and working at a much higher level than I had for the past ten years in the northeast. 

So I did what I knew always worked.  I headed down to my basement studio and sweat my ass off everyday.  I danced, did circuit training, lifted weights, and did exercise videos.  I measured myself, and studied my movements in the mirror in my sports bra and underwear.  As I gained strength and confidence, I watched lean muscle take the place of fat.  I never once thought that what I was doing was inferior, less effective, or an "at-home exercise program."  I was training, and I was training HARD. 

Back then fitness studios didn't exist and gyms were filled with "weird" weight lifters and cheesy group step classes.  Home was where I broke a sweat; where I could focus on me and work as hard as I possibly could without anyone watching. 

Even long after my cheer career ended, and I ran fitness studios (Lithe Method) for eleven years, I never stopped training at home.  In fact, I worked out entirely at home throughout my pregnancy and about three quarters of my workouts were at home while I operated Lithe. 

I'm a fitness expert and I love a really great studio experience, but there are many advantages to sweating at home.  The hardest part is getting started.  You really don't need to go anywhere or pay a lot of money to get an amazing, top-notch workout. A few benefits of at-home fitness and Studio LB: 

Home = habit
You're already there.  You can create consistency and habit without going anywhere.  There's a real honest truth to training at home.  It's you against you.  You're stripped of excuses, so the only thing that's stopping you is YOU.  Find your strength and become stronger than your strongest excuse. 

Studio LB = quality over quantity
Studio LB Streaming gives you two new 50-minute workouts and two, Under 30 minute Quick Burns every week. My expert programming is indispensable for achieving an athletes body and is next to impossible to imitate or achieve in a studio setting (I tried for years). 

I'm a big believer in quality over quantity.  I train you rather than have you be in charge of programming your weekly workouts.  Why?  Because you'll end up doing what you like vs. what you really need and may create muscle imbalances.  Many people think that they want access to hundreds of workouts all the time vs. three-four new workouts each week, but the reality is, most people will become comfortable and do the same three workouts on repeat.

Home = fits your life
Group exercise is fun and can be performative for some, but 99% of people tend to hold back in a group setting without even realizing it.  They often hide out in the back row (trainer can't see you), workout in layers of baggy clothing (same, and you can't see you), rarely look at themselves in a mirror (zero connection), or grunt (break through and push it!).  Studios certainly have a more social quality than your home can offer, but hear me loud and clear... Being social does not make your workout effective. Often, the opposite is true! 

Home = freedom
In a group setting, your time spent resting or doing is largely determined by what I call the middle (other people) in class as is your choice of exercises. Unless you're taking a private session, your instructor is also teaching to the middle.  At home, you're free to work at your level without group water breaks.  And, you can take Studio LB wherever you go. 

Home = the results you truly desire
To get the results you really want, fitness must not be taken lightly.  Most studio members are not in that mindset.  They focus on the fun, social aspects of exercising with other people, rather than focusing on their own body and the effectiveness of the workout. 

Home = safe space
When you're in your home, magic can happen if you allow it to.  You're in your safest space, so push yourself as hard and as much as you want to.  Nobody is watching.  I think that you'll find that it leads to your most productive workout.

Xx
Lauren

Lauren Boggi ACTIVATION Tulum

LBA.jpg

Sometimes the best way to recharge is to get out and get moving.  Change doesn't happen by accident.  We worked hard and played hard:  10 Activation workouts (including over 20 miles walked/run/biked), a Temezcal session, sunsets, coconuts, waterfront views, amazing food, and plenty of R & R is how we get there.  

Our group of 12 came from DC., Houston, Philadelphia and Salt Lake City.  Nine of the 12 people who went to Tulum chose to be measured and lost over 50" combined in 5 days, and all increased strength and endurance. 

So many people think that you have to deprive yourself to see the results and actually the opposite is true.  You have to feed your body to achieve change.  We enjoy three meals, two snacks, desert and wine every day, so there's no deprivation.  Can't wait to share their results and tell you where we're off to next. 

crispy chicken bites

Looking for a new under 500 calorie dinner to make that everyone will adore?  These Crispy Chicken Bites are a part of my 5-Day Kick-Off menu, but I make them almost every week.  They're healthy, light and so good.  This recipe takes 15 minutes to prep, and it’s very easy to make.  Serving size: 5 bites with 2 cups of green salad.  Tonight I subbed in brown rice.  Enjoy!

Ingredients:

  • 3 boneless skinless chicken breasts weighing about 6 oz. each
  • 1-cup oat bran
  • 1-cup wheat germ
  • 1 Tbsp. coarsely ground flaxseed
  • 1 cup coarsely ground almonds
  • 1 tsp. sea salt
  • 1 tsp. pepper
  • 1 pinch garlic powder
  • 1-cup water or low sodium chicken broth
  • 1 large egg white, beaten

Preparation:

  1. Preheat oven to 400 degrees. Line baking pan w/parchment paper or coat lightly with cooking spray.
  2. Cut chicken breasts into 1.5” nugget-sized pieces. Set aside.
  3. Combine all dry ingredients in a large container with a tightly fitting lid. Shake well. This is your coating mixture
  4.  Combine water & egg in a medium bowl. Dip each piece in the water/egg white mixture. Then dip each piece in the coating mixture. Make sure each piece is well coated.
  5. Place on the baking sheet. When all of your chicken has been coated and your baking sheet is full, place in the oven and bake for 10-15 minutes or until golden.

let's get in formation

Hey!  My name is Lauren Boggi and I’m a fitness expert and fitness artist, athlete, celebrity trainer, and creator of the Cardio-Cheer-Sculpting technique.  

I am a cheerleader and an athlete.  I cheered my way to the collegiate level, Division 1A in the SEC at the University of South Carolina.  Cheer is by far the most underrated sport and workout out there (yes, it’s a sport!).  I'm also known as a pioneer of boutique fitness, and for the last decade I built and ran an incredibly successful studio-based beast of a fitness brand in Philadelphia, which was based on the spirit of cheerleading.  

Cheer evokes powerful change.  Inspiring and connecting people through movement is my passion, and creating fun and effective fitness content is my gift.  In 2015, a friend persuaded me to launch into tech by tapping into the powerful social media channel of Instagram with a fitness challenge.  The Build A Peach challenge was an epic hit and people from all over the world joined in to break a sweat and motivate each other. 

In January 2016, SELF Magazine and Active.com named @LaurenBoggi one of the top Instagram fitness channels to follow.  Within a few months people craved more than a 15-second clip, and Lauren Boggi Active was born.  

Where are we going?  Everywhere.  Join in online 24-7 at virtual Studio LB, get fit IRL with LB Active LIVE, and wander the globe with us.  I’m excited to break out of studio walls, activate the world, motivate people to branch out of their comfort zones, to find their strength, and be in charge of their future. 

Follow me.  I'll be talking fitness, beauty, health and wellness, style, sexuality, music, mom life, travel and culture on this channel.  

LB